

Get The Lashes Of Your Dreams With Lilac St. Lashes!
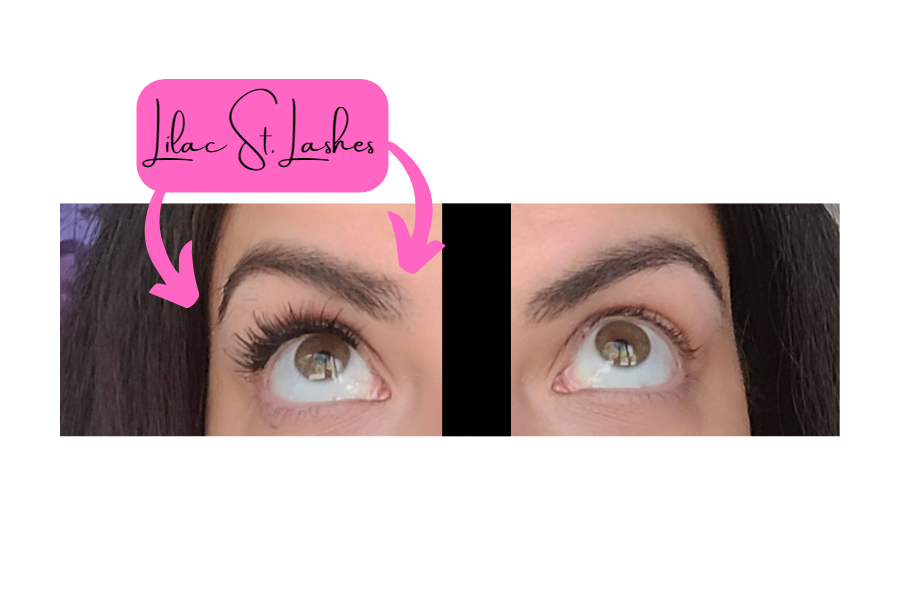
Oh, lashes, how I love thee!! Everyone can agree gorgeous long luscious lashes can change your entire face. If you are like me, you are most likely blessed with many things; however, amazing lashes are not one of them. I have tried more mascaras and lash serums than I'd want to admit. As a licensed esthetician, I have been obsessed with all things beauty for years. The only time I loved my lashes was when I had lash extensions. However, being a stay-at-home mama, I don't have the time or energy to keep them up. Not to mention that is a cost I can not justify. I'd given up and just figured I'd use some strip lashes for special occasions and call it a night. Then I found Lilac St.! Game changer.
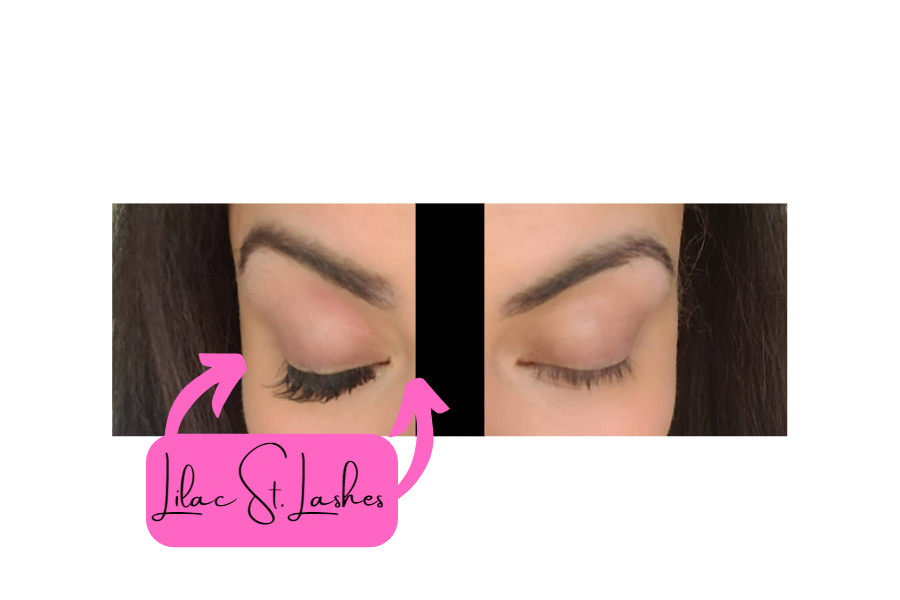
These at-home lash extensions are so easy to put on and look beautiful. They are so light I forget they are even on! I have sensitive eyes, wear contacts, and don’t get me started on my allergies. I have had no issues with wearing or sleeping in them! They have no strip, you can sleep in them, and they are waterproof. They can last up to 7 days with their original glue and up to 10 days with the pro. They are your natural lashes just better. With an easy removal process, your natural lashes do not get damaged. The best part is you do them at home for an amazing price! As my best friend said when she saw them on “They, look like you just have fabulous lashes!” Let's jump in with the products and my tips and tricks so you can achieve your dream lash look!
GLUE. LASH. FUSE. SEAL.
Step One: Prep with Conditioning Primer
Remove all makeup and products from your eyes and dry well. Use the primer to prepare your lashes for glue. I use a cotton pad to apply. Let dry.

$15
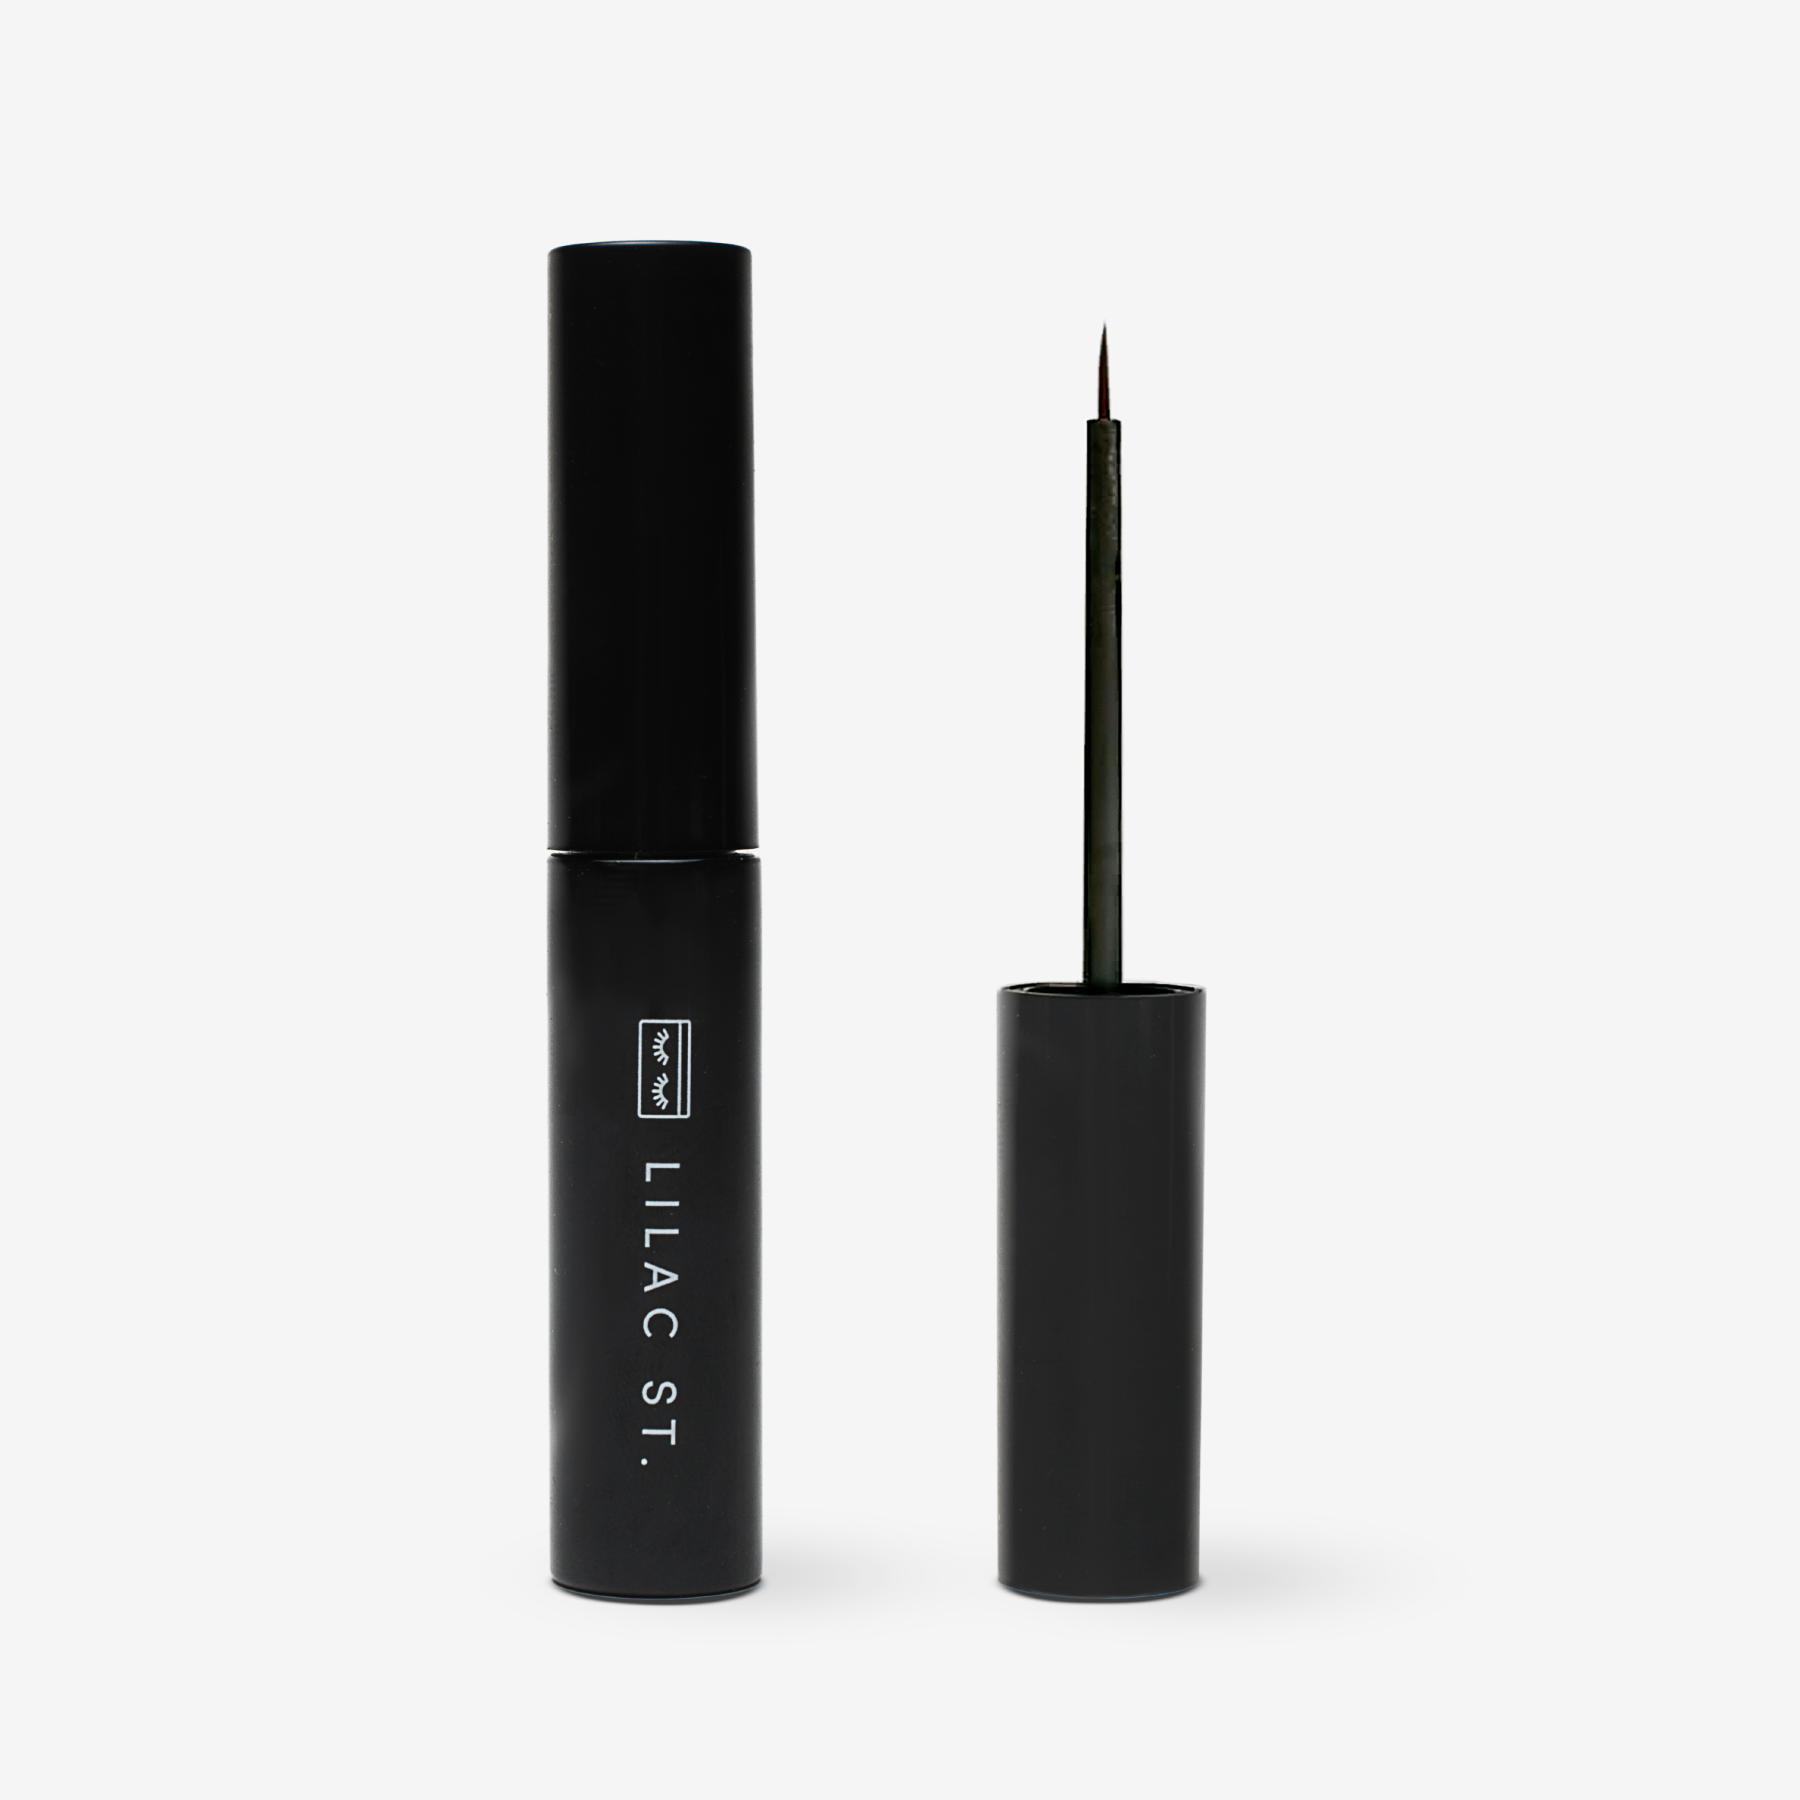
Step Two: Glue
I curl my lashes because my natural lashes have no curl. Curling them helps me to apply them a lot easier. As mentioned above, there are two different types of glue available.
There are slightly different application processes.
Original Lilac Glue:
This applicator is a very skinny brush tip. You will apply it on the base of your lashes, almost dotting your lashes. You will apply it to both of your eyes. This glue needs to dry 15 seconds before applying the lash segment for the glue to get tacky.
$10
Pro Glue:
This applicator is a wand. You will apply it like mascara. Start at the base wiggle, and then swipe up your entire lash. Keep swiping until the glue starts to bead up slightly. About 5 swipes. The pro glue dries faster, so you don't have to wait to dry. You could do one eye at a time if you wanted to. I have done one eye at a time with this glue and applied glue on both lashes. I prefer doing one at a time. I don't have to deal with my lashes getting stuck together.

$15
Clear vs. Black
Both types of glue come in black and clear. I have tried both and prefer the black. It adds the appearance of a darker lashes line which is a nice added benefit. The main reason I like the black is bc I don't like the clear. It doesn't dry clear for me. I don't know if it's because I have black lashes or if that's just how it is. Once dry, it appears to look crusty..not cute.
Lash Application:
Showtime! Lilac St has a great selection of lashes to get the look you're trying to have. Whether super delicate, natural, or dramatic. I would suggest starting with the originals. They are very natural-looking. They come in 4 lengths. 10mm, 12mm,14mm,16mm. I use 10mm and 12mm. I apply 1 10mm on the inner corner and the rest with 12mm. I think that gives the most natural look. Which lashes should you choose? Take the lash quiz to find your best lashes based on your eye shape and desired look! Lash Quiz.
Applicator:
You can use any tweezer to apply these. I use a Lilac St. applicator wand, which is ergonomically designed to apply the lashes.

$12
Process:
I always start placing the segment for the outer corner and inner corner of my eye. That way the lashes stop and start where I want them to. Add a small amount of glue to the band of the lash segment. If using the pro glue, you can apply it right away. If using the original glue, you will want to wait 15 secs so the glue can get tacky. Grab the lash segment with the wand at an angle for a more accessible application. Place underneath lashes about 1- 2mm above the lid to avoid sensitivity and discomfort. If you place the segment too close to the lid your lid will get stuck to your lashes. Hold for 3-5 secs. I use the base of the applicator want to push on the lash slightly. You will continue this process for the rest of your eye. Slightly overlapping to create a seamless look. My eyes apparently are not twins and I apply the segments slightly different on each eye: overlapping more on one eye than the other. Hence my trick to placing the outer and inner segments first really helps with this. Using the pro glue, you can do one eye at a time. If you are using the original, you will want to rotate your eyes. Apply 1 segment on the right side, then left, etc. Once done, you will "fuse" your lashes using your applicators to squeeze your natural lashes and extensions together at the base! Apply a light coat of the crystal coat once the lashes are dry to remove the stickiness from the glue and seal the lashes.

$12
Application tips:
Before I begin the application process I add an eye cream to my lid (not close to the lash line) and undereye. Sometimes, somehow I will get glue places it is not supposed to be. This helps to wipe any glue off easily without affecting the application process.
When applying the lashes on the outer and inner corners, apply extra glue on the lash extensions. They will get the most wear and tear, so you want extra glue love on those areas.
Although you want to make sure you have enough glue, make sure to not use too much glue. I apply a good amount on my lashes however a light sweep on the lash segments themselves. If you apply too much glue it will make it more difficult for the lashes to dry and adhere properly.
When "fusing," if you feel like the applicator is pulling or moving the lashes, you can use your fingers to pinch your lashes together. I also will apply the crystal coat to the applicator to help with any sticking. Let them dry. I just wait a few mins.
Wait for 24 hrs to get your lashes wet. I just use a washcloth to wash my face instead of splashing my face. I will also apply my lashes after I shower so I can attempt to keep them dry.
Give yourself a chance to get it right! My first application took me 30 minutes and looked good but not great. It took me about 3 applications to really feel like I had a hang of it. It now takes me about 10 minutes to apply!
Maintenance:
If you want your lashes to look as fabulous as possible, you will want to clean them properly. I use their lash bath kit. The kit comes with an ultra-soft lilac makeup towel that easily removes makeup using just water. A non-irritating foam lash cleanser and eye makeup remover formulated specifically for DIY lash extensions. A dual-sided brush and spoolie with a soft brush to gently clean your lashes and lids and a spoolie to freshen up and fluff your lashes. All in a fun holographic cosmetic bag that I keep all my lash essentials in. Pump 1 or 2 pumps of the foam cleanser into the cleanser lid. Take the brush side and get the cleaner in there. Brush on your lid to remove makeup and all over your lashes. Repeat the process with the spoolie side and swipe through lashes. Repeat the process with water this time. Let dry, then brush lashes with the spoolie to fluff up!! Reseal with crystal coat and fuse! I wait for 24 hrs after the application to clean them to make sure everything adheres properly.
Fuse your lashes every day. You can use any methods already mentioned, but my favorite is with a lash curler! I apply the crystal coat to the cushion of the curler and curl them! Adds a great lift to your lashes!

$35
Removal:
I use the ciao for now to remove. Or any oil-based makeup remover. Apply the oil all over the base of your lashes and wait a few minutes. Only pull lashes when you're able to easily pull them off. The ciao, for now, has a comb-like end that I pull through lashes to remove excess glue. I usually do this before I shower to wash my face and lashes really well before my next application! When do you know it is time to remove your lashes? They start looking not as fabulous or they may begin getting loose.

$15
I started out with purchasing the travel kit. It is $65 and it comes with Primer, Crystal Coat, Ciao for Now Lash Remover, Travel Case, and Applicator. You also pick and choose your favorite 3 sets of lashes: 30 lash clusters in total. With your choice of either the clear or black PRO Lash Glue. It is the best bang for your buck! It is a great set to get started with the essentials to have the best outcome.

$65
Lilac St. has fantastic customer service. They also have great videos to help you visualize the process as well. Check them out here!
